Discovering water pooling around your indoor air conditioning unit or dripping from ceiling vents can be alarming. While some condensation is a normal byproduct of the cooling process, a persistent leak indicates a problem within the system that requires attention.
Air conditioners work by removing heat and humidity from indoor air; this extracted moisture typically collects and drains away unseen. When water starts leaking inside your home, it signals a disruption in this drainage process or another malfunction within the unit. Ignoring such leaks can lead to significant water damage to floors, walls, and ceilings, promote unhealthy mold and mildew growth, and potentially damage the AC system itself.
Fortunately, many common causes of indoor AC leaks can be diagnosed and sometimes resolved by homeowners with basic tools and safety precautions, though for complex issues, you may need professional aircon services.
Before attempting any inspection, cleaning, or repair on your air conditioning system, always shut off power to both the indoor air handler and the outdoor condenser unit at the main electrical panel or breaker box. Turning off the thermostat alone is insufficient. Refer to your specific AC unit’s manufacturer manual for guidance, use appropriate tools, wear protective gear, and handle chemicals safely. Never attempt to handle refrigerant yourself, as it requires certified professionals with specialized equipment.
Cause 1: Clogged Condensate Drain Line
Why it Happens
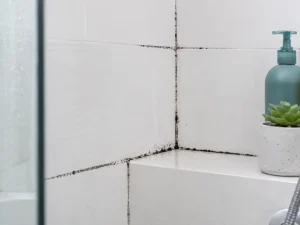
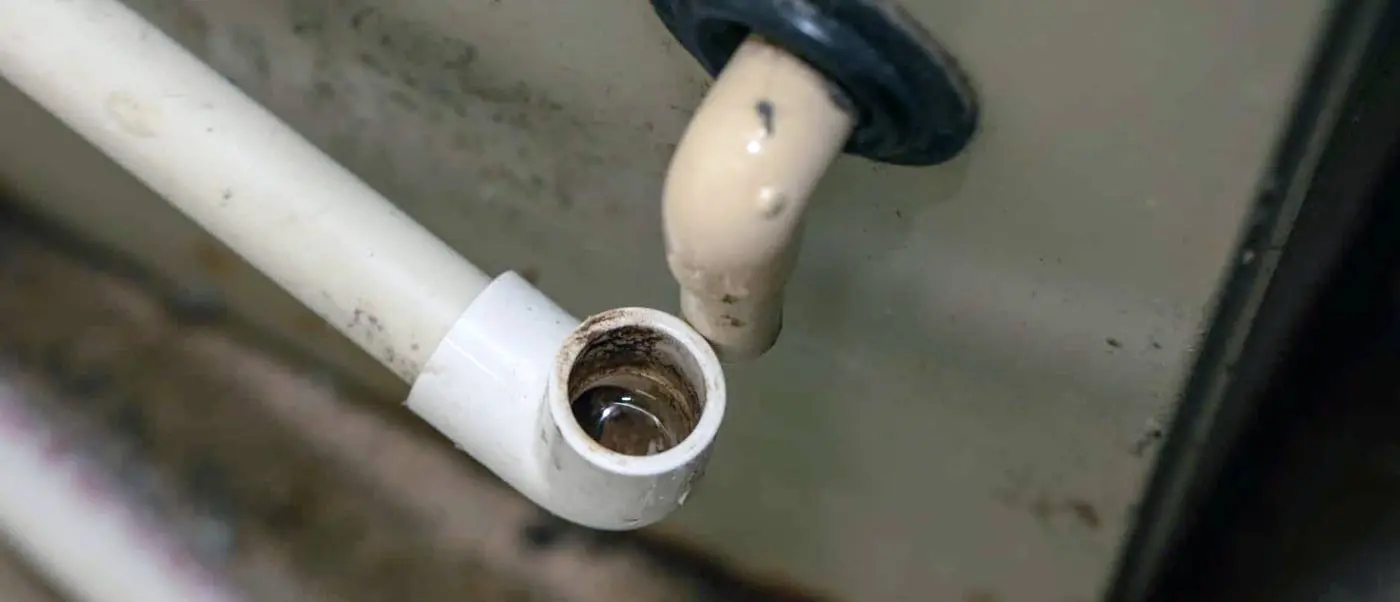
As your AC cools and dehumidifies the air, moisture condenses on the cold evaporator coil and drips into a drain pan. This water is then channeled outside through a condensate drain line, typically a PVC pipe. Over time, this dark, moist pipe can become clogged with dirt, dust, mold, algae, sludge, or other debris. When the drain line is blocked, water cannot escape, causing it to back up into the drain pan and eventually overflow, spilling into your home, often around the indoor unit. The most obvious sign is water pooling on the floor around the indoor air handler. You might also notice musty or moldy odors near the unit or vents, indicating biological growth in the damp environment created by the backup.
How to Fix It Yourself
First, turn off the power to the AC system at the breaker box. Locate where the condensate drain line exits your home, usually a white PVC pipe near the foundation or outdoor unit. Check this opening for visible blockages like leaves, dirt, or insect nests.
Use a wet/dry vacuum cleaner set to suction mode. Place the vacuum hose over the drain line opening outside and try to create a tight seal with your hands or a rag to suck out the clog. Run the vacuum for a few minutes. You might hear or feel the blockage clear.
If vacuuming from outside doesn’t work, find the access point indoors. This is often a T-shaped fitting with a removable cap located on the drain line near the air handler or evaporator coil. Place rags or a bucket underneath before opening. Remove the cap and use a thin, flexible brush (like a condensate drain brush, pipe cleaner, small bottle brush, or stiff wire) to gently push through the line towards the outside, dislodging the clog.
Once the clog seems clear, pour a cleaning solution down the indoor access point. Use either about 1 cup of distilled white vinegar or a diluted bleach solution (1 part bleach to 10 parts water). Let the solution sit for about 30 minutes to help kill residual mold or algae. Follow by flushing thoroughly with clean water. Go outside and confirm that water is now draining freely from the pipe exit. Replace the access cap. For persistent clogs, consider a professional aircon chemical wash or chemical overhaul to thoroughly clean the system.
Cause 2: Dirty Air Filter

Why it Happens
The air filter’s job is to trap dust, pet hair, and other airborne particles before they enter the HVAC system. When the filter becomes clogged with debris, it severely restricts the flow of warm indoor air across the evaporator coil. The evaporator coil needs this airflow to absorb heat. Without sufficient warm air, the refrigerant inside the coil gets too cold, causing moisture in the air to freeze onto the coil’s surface. When the AC unit cycles off or the ambient temperature rises, this accumulated ice melts. The volume of meltwater can overwhelm the capacity of the drain pan and drain line, leading to overflow and leaks inside the house.
You may notice reduced airflow from supply vents, the AC struggling to cool the house, visible frost or ice forming on the indoor unit’s coil or refrigerant lines, and water leaking, particularly after the unit has been running for some time and then cycles off. The most direct indicator is visually inspecting the air filter and finding it heavily coated with dust and debris. A simple test is to hold the filter up to a light source; if light cannot pass through easily, it’s clogged.
How to Fix It Yourself
Turn off the power to the AC system at the breaker. Find the air filter, typically located in the return air duct grille (often a large vent in a wall or ceiling) or in a dedicated slot on the air handler unit itself. Slide the old filter out and check the size printed on the filter’s cardboard frame – you need an exact match for the replacement.
If it’s a disposable filter and it’s dirty, replace it with a new one of the correct size. If it’s a reusable/washable filter, clean it according to the manufacturer’s instructions, usually rinsing with water, sometimes mild soap. Ensure a washable filter is completely dry before reinstalling it, as a damp filter can promote mold growth and restrict airflow.
Insert the new or cleaned filter, making sure the airflow arrow printed on the frame points in the correct direction – typically towards the air handler/furnace. Secure any access panels or grilles. For guidance on regular cleaning and maintenance, check out how to clean your aircon and fans.
Cause 3: Frozen Evaporator Coil

Why it Happens
The evaporator coil is the part of the indoor unit where refrigerant absorbs heat from the air. It needs a constant flow of relatively warm air passing over it to function correctly. If this airflow is restricted (due to a dirty filter, blocked return vents, closed supply vents, collapsed ductwork, or a malfunctioning blower fan), the coil doesn’t absorb enough heat, and its surface temperature drops below freezing, causing condensation to turn into ice. Alternatively, low refrigerant levels also cause the coil temperature to plummet, leading to freezing, irrespective of airflow. Running the AC when outside temperatures are very low can also cause freezing.
The most definitive sign is visible ice or frost covering the evaporator coil inside the air handler. Other indicators include significantly reduced cooling performance, weak airflow from vents, and water leaking from the indoor unit, often starting after the cooling cycle ends. If low refrigerant is the cause, you might hear a hissing or bubbling sound.
How to Fix It Yourself
Immediately turn the thermostat setting from COOL to OFF. This stops the refrigeration cycle and prevents further ice buildup. Switch the thermostat’s fan setting from AUTO to ON. This forces room-temperature air to circulate over the frozen coil, significantly speeding up the thawing process. Allow several hours for the ice to melt completely; it can take longer than expected depending on the amount of ice.
While the coil is thawing, inspect the air filter. If it’s dirty, replace it. This addresses the most common cause of airflow restriction. Ensure all supply and return air vents throughout the house are open and not blocked by furniture, rugs, curtains, or other items. Place towels or use a wet/dry vacuum around the base of the indoor unit to catch the melting water and prevent damage. Check periodically as the ice melts.
Crucially, do not attempt to chip, scrape, or break the ice off the coil with any tools. The coils and their delicate fins are easily damaged, leading to costly repairs or refrigerant leaks. Be patient and let the fan do the work. Do not attempt to add refrigerant.
Cause 4: Damaged or Rusted Drain Pan

Why it Happens
The drain pan is positioned directly beneath the evaporator coil to collect the condensation that drips off it. This collected water normally flows out through the condensate drain line connection. However, over many years of exposure to moisture and potentially acidic condensate, metal drain pans can corrode and rust through. Plastic or polymer pans, while immune to rust, can become brittle with age and develop cracks. Any hole, crack, or perforation in the pan allows water to leak directly out onto the floor or ceiling below, bypassing the drain line entirely. Additionally, if the wrong size drain pan was installed during a previous repair, it might not fit correctly, leading to spills.
You may notice water leaking from the bottom of the indoor unit, often appearing as drips or a puddle directly beneath the air handler, even when the drain line itself is confirmed to be clear. Upon visual inspection (after removing access panels), you may see obvious rust holes, cracks, or significant corrosion on the drain pan surface.
How to Fix It Yourself
Turn off power to the AC system at the breaker. Remove the necessary access panel(s) on the indoor air handler to get a clear view of the drain pan situated below the evaporator coils. If there’s standing water in the pan, use a wet/dry vacuum or rags to remove it. Thoroughly clean the pan with soap and water or a suitable cleaner to remove any slime or debris, then dry it completely. This allows for proper inspection.
Carefully examine the entire surface of the pan using a flashlight, looking for any cracks, holes, rust spots, or severely corroded areas. For very small, clean cracks in a plastic pan, a temporary repair might be possible by applying a waterproof epoxy or sealant specifically designed for HVAC use or plastics. The surface must be perfectly clean and dry before application. Allow the sealant to cure fully according to its instructions. Test the repair by carefully pouring a small amount of water into the pan and checking for leaks.
For rusted pans, large cracks, or extensive damage, replacement of the drain pan is the only reliable solution. Replacing the drain pan often involves disconnecting the drain line and potentially lifting or shifting the heavy evaporator coil, making it a job best suited for a professional technician. Understanding the various aircon parts and their functions can help you better communicate with technicians when professional help is needed.
Cause 5: Low Refrigerant
Why it Happens
Refrigerant is the lifeblood of the air conditioning system, circulating between the indoor and outdoor units to absorb heat from inside and release it outside. AC systems are designed to operate with a precise amount (charge) of refrigerant. If the system develops a leak – due to factors like corrosion on coils or lines, vibrations loosening fittings, or physical damage – the refrigerant level drops. This reduction in refrigerant causes a drop in pressure within the evaporator coil. Lower pressure means a lower boiling point for the refrigerant, causing the coil to become excessively cold, far below the freezing point of water. Consequently, moisture from the air freezes onto the coil surface. When the system cycles off, this ice melts, and the resulting water overflows the drain pan, leading to an indoor leak. It is critical to understand that refrigerant is not “used up” like fuel; low levels always indicate a leak that must be repaired.
One of the primary symptoms is inadequate cooling; the air blowing from the vents may not be as cold as usual, or the system runs constantly without reaching the set temperature. You might hear distinct hissing or bubbling sounds near the AC components, indicating escaping refrigerant gas. The most visible sign is often a repeatedly freezing evaporator coil, even when the air filter is clean and airflow seems unobstructed. Utility bills might also increase as the system struggles to compensate.
How to Fix It Yourself
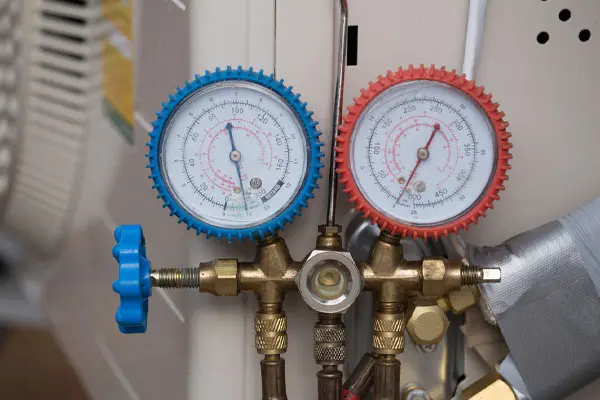
There are NO safe or legal DIY fixes for refrigerant issues. Handling refrigerants requires EPA certification and specialized tools for leak detection, evacuation, repair, and recharging. Attempting to add refrigerant without fixing the leak is ineffective, environmentally harmful, and potentially illegal.
Do not attempt to handle refrigerant containers or service ports. Refrigerant can cause frostbite on contact and is harmful if inhaled. Avoid open flames near suspected leak areas. Immediately contact a certified technician upon suspecting a refrigerant leak based on the symptoms described. A certified technician must locate the leak using specialized methods, repair the damaged component, and then properly evacuate and recharge the system to the manufacturer’s specifications. For detailed information about refrigerant issues, check out this guide on aircon gas leaks.
Cause 6: Condensate Pump Failure
Why it Happens
Standard AC installations rely on gravity to drain condensate water away. However, when the indoor unit is located below the drain exit point (e.g., in a basement) or the drain line must travel a long horizontal distance or uphill, a condensate pump is necessary. This device collects condensate in a small reservoir. When the water level rises high enough, it lifts a float switch, which activates the pump motor to push the water out through a discharge tube. If the pump motor burns out, the float switch becomes stuck (either up or down) or fails electrically, or if the pump’s reservoir or discharge tubing develops cracks or blockages, the pump will fail to remove the water. As condensation continues to collect, the reservoir overflows, causing water to leak around the pump and the indoor unit.
You may notice water leaking specifically around the condensate pump assembly (usually a small plastic box near the air handler, connected to the drain line). The pump may be making unusual noises or no noise at all when it should be running. The reservoir might be full of water, but the pump isn’t activating.
How to Fix It Yourself
Turn off power to the AC system. The pump might be plugged into a nearby outlet or wired directly; ensure its power source is also off if possible. Identify the condensate pump unit. Verify the pump is plugged in securely or that its circuit breaker hasn’t tripped.
Carefully remove the pump cover (if applicable) to access the float switch. See if it moves up and down freely. Sometimes debris can cause it to stick. Gently try to move it; if it feels stuck or broken, it needs attention. Visually check the pump’s reservoir tank and the discharge tubing connected to it for any obvious cracks, kinks, or blockages.
Most sources indicate that diagnosing internal pump failures (motor, switch) or replacing the pump typically requires professional service. Homeowners may find it difficult to source the exact replacement pump model. If the pump has power but isn’t running, if the float switch appears broken or unresponsive, if the motor is humming but not pumping, or if there is visible damage to the pump housing or tubing, call a professional.
Cause 7: Improper Installation / Incorrect Leveling

Why it Happens
For proper condensate drainage, the indoor air handler unit and/or the drain pan beneath the evaporator coil must be installed perfectly level or with a slight downward slope towards the drain line outlet. If the unit or pan is tilted away from the drain opening, water will naturally pool at the low end and eventually spill over the edge, causing a leak even if the drain line itself is clear and unobstructed. Similarly, if drain line connections were not properly made or sealed during installation, leaks can occur at these joints. For window AC units, the principle is similar but reversed: the unit must be installed with a slight downward tilt towards the outside to ensure condensate drips harmlessly outdoors rather than back into the room.
You may notice persistent water leaks that cannot be attributed to clogged drains, frozen coils, or damaged pans. Leaks might be more noticeable on recently installed or serviced systems. Visually, the indoor unit or drain pan might appear tilted incorrectly. Using a bubble level can confirm if the unit/pan is level or sloped appropriately towards the drain.
How to Fix It Yourself
For window units, check the tilt using a level. The front (indoor side) should be slightly higher than the back (outdoor side). If it’s tilted inwards or level, adjust the supporting brackets or use shims under the unit to achieve the correct outward slope.
For central AC units, turn off power. Visually inspect the air handler and the drain pan. Use a level placed on the unit or pan edge to check for proper orientation relative to the drain outlet. However, adjusting the level of a heavy central air handler or repositioning the drain pan often involves loosening mounting hardware, potentially disconnecting ductwork or lines, and requires careful shimming or support adjustments. Due to the weight and complexity, this is generally not recommended as a DIY task for central systems and is best left to professionals.
If a central AC air handler or drain pan appears improperly leveled or sloped, contact a professional. If you suspect improperly connected drain lines from the initial installation, or if the system is new and leaking, contact the original installation company, as they should correct their work.
Cause 8: Malfunctioning Float Switch / Disconnected Drain Line
Why it Happens
Many modern AC systems incorporate a safety float switch as a backup measure. This switch is typically located in the primary or secondary drain pan, or inline with the condensate drain pipe. Its purpose is to detect rising water levels (indicating a clog or other drainage problem) and automatically shut down the AC system before the pan overflows, thus preventing water damage. However, these switches can fail. They might get stuck due to debris or sludge, suffer electrical failure, or be installed improperly. If the float switch malfunctions and fails to trigger the shutdown, water will continue to accumulate in the pan during AC operation and eventually overflow, causing a leak despite the presence of the safety device.
Additionally, the connection point where the drain pan outlets into the PVC drain line, or joints within the drain line itself, can sometimes become loose or completely disconnected. This can happen due to system vibrations over time, accidental bumping during maintenance or filter changes, or simply from improper initial installation where fittings weren’t securely glued or fastened. When a disconnection occurs, condensate water spills out at the point of the break instead of flowing through the pipe to the outside.
For a malfunctioning float switch, the primary symptom is the drain pan overflowing even though a float switch is present. For a disconnected line, you might see water leaking directly from a specific connection point near the drain pan or along the drain line path, rather than just overflowing the pan itself. A leak appearing suddenly after recent service work might also point towards an inadvertently disconnected line.
How to Fix It Yourself
Turn off all power to the AC system. Locate the float switch assembly and visually inspect it. Does it move freely up and down, or is it stuck? Check that the wiring appears connected and undamaged (visual check only). Testing the electrical function of the switch usually requires a multimeter and expertise.
Carefully inspect the point where the drain pipe connects to the drain pan outlet. Is the connection secure? Follow the accessible portions of the drain line, checking any fittings or joints for signs of looseness, gaps, or disconnection. If you find a simple push-fit connection that has come loose and is easily accessible, you may be able to firmly push it back together. However, many drain line connections are intended to be permanently sealed with PVC primer and cement. Attempting to re-glue a connection requires proper cleaning, priming, and cementing technique, and is often best left to professionals if unsure.
If you suspect the float switch is faulty (stuck, broken, not shutting off the system when water is high), as it likely needs professional testing and replacement. Similarly, if a drain line is disconnected in an area that’s difficult to access, or if the connection requires proper PVC cementing to ensure a watertight seal, contact a professional.
Conclusion
An air conditioner leaking water indoors is a common household problem, often stemming from straightforward issues related to drainage or airflow. Clogged condensate drain lines, dirty air filters leading to frozen coils, and damaged drain pans are among the most frequent culprits. Many of these causes, particularly clogged drains and dirty filters, can often be addressed by homeowners using basic tools and following safety precautions, primarily ensuring the power is disconnected before work begins.
However, the interconnected nature of the AC system means that a leak can sometimes signal a more complex problem. A frozen coil, for instance, might be caused by a simple dirty filter, but it could also indicate a refrigerant leak – an issue requiring immediate professional attention due to safety hazards and regulatory requirements. Similarly, failures in components like condensate pumps or safety float switches, or problems arising from improper installation, typically necessitate diagnosis and repair by a certified HVAC technician.
Recognizing the limits of DIY repair is as important as knowing how to perform basic maintenance. While homeowners can be empowered to handle simple fixes, attempting repairs beyond one’s skill level, especially those involving refrigerant or complex electrical components, can be dangerous and may cause further damage. If you notice signs that your aircon needs servicing, such as poor cooling or unusual noises, it’s often best to call professionals.
Ultimately, the most effective strategy for dealing with AC leaks is prevention. Consistent, proactive maintenance – including regular air filter changes, periodic drain line flushing, keeping units clean and unobstructed, and investing in an annual professional tune-up – is the key to minimizing the risk of leaks, ensuring efficient cooling, and extending the lifespan of your air conditioning system. For comprehensive maintenance, consider booking one of the various types of aircon services from experienced technicians at Helpling Singapore. Regular upkeep helps catch potential problems early, saving homeowners the stress, mess, and expense of dealing with unexpected water damage.
About Helpling
Helpling is a super app for household services. As a home service company, we work with, and train cleaning professionals to provide a wide range of services such as home cleaning service, aircon service, carpet cleaning, and mattress cleaning.
Beyond that, we also provide solutions for other household needs such as handyman, plumbing, and gardening service, all of which can be seamlessly and efficiently booked through our app or, for existing customers, via their personal Home Advisors.
Helpling’s professional cleaners are top-rated, thoughtful and thorough which give you the confidence and assurance you need so that you can focus on your priorities.
Helpling – A world of household services, just one click away.